
Timeline Guide for Your Home Renovation
When you trade a swinging door for a smooth sliding system, the first question is not about colors or styles. It is practical and born out of a desire to avoid living in an active construction zone. You simply want to know how long the process will take. We have all been burned by the classic one-hour project that stretches into a frustrating multi-day saga.
The good news is that a standard barn door installation is efficient compared to building a pocket door. For a single interior door on a stud wall, you are looking at a commitment of two to four hours. This timeline tracks the process from opening your toolkit to the final, satisfying test glide. However, that specific timeline is not entirely set in stone for every single room. The total duration relies heavily on a handful of crucial variables like your tools and your wall.
Why Timing Varies: The Anatomy of the Installation Process
To understand where the hours go, it helps to break the assembly process down into its core phases. Many homeowners assume the bulk of the time is spent hanging the door panel itself. The reality of home renovation is that preparation and precision take up the majority of the clock. If you rush the setup work, you will certainly pay for it later when the door rolls open on its own.
1. Preparation and Site Assessment (30 to 45 Minutes)
Before a single screw is driven into the wall, you need to assess the canvas you are working with. This phase involves locating wall studs and checking the floor and ceiling for level alignment. You must ensure there is enough clearance next to the opening for the door to slide completely free. Houses are notorious for not being perfectly square, which can complicate your project. If your wall has a slight bow, you have to account for that variance right now. Misjudging the layout early can add an extra hour of troubleshooting later.
2. Mounting the Header Board (45 to 60 Minutes)
If there is a crucial element of this project, it is the header board. Standard track hardware comes with pre-drilled holes that rarely line up with your specific studs. To ensure the door stays secure, a solid wood header board is mounted into the wall studs first. Then, the metal track is mounted directly to that sturdy wooden header. Measuring, cutting, painting, and leveling this board is often the most time-consuming step. It requires extreme patience because if this board is crooked, your door will fight gravity.
3. Track Assembly and Hardware Attachment (30 to 45 Minutes)
Once the header is secure, the steel track is bolted into place using heavy lag bolts. Simultaneously, you will need to prep the door panel by measuring and drilling hardware holes. This involves attaching the roller hangers safely to the top or face of the door panel. You will also need to install floor guide rollers and small anti-jump discs. Taking your time here prevents the hardware from scratching your finishes during daily operation.
4. Hanging and Adjusting (30 to 45 Minutes)
This is the moment of truth where the components finally come together. You lift the door panel, guide the rollers onto the track, and let the weight settle naturally. Once it is hanging, the real fine-tuning begins to ensure a silent glide. You will need to install floor guides to keep the bottom of the door from swinging outward. Finally, you adjust the rubber stoppers on either end of the track to limit total travel.
The DIY Versus Professional Time Dilemma
Let us be completely honest about our home improvement capabilities for a quick moment. We all like to think we are master craftspeople after watching a brief online tutorial video. However, your actual skill level plays a massive role in how many hours this project will eat.
The Weekend Warrior Approach
If you tackle this as a DIY project, give yourself a generous time buffer. If the online guide says two hours, you should block out four or five hours on your calendar. This extra time accounts for moments spent hunting down tools or second-guessing measurements.
You will also want to read the instruction manual carefully to avoid common structural pitfalls. DIY installations take longer because you are learning the nuances of the hardware in real-time. Taking it slow ensures you do not end up with accidental holes in your drywall canvas.
Bringing in the Pros
If you hire a professional installer, they will likely finish the job in two hours. They arrive with specialized tools and a deep familiarity with all major hardware brands. They also possess the muscle memory required to find studs and level tracks quickly. For many homeowners, the cost of labor is a worthwhile trade-off for getting an afternoon back. It turns a potential weekend headache into a quick project completed while you catch up on chores.
Common Complications That Can Derail Your Timeline
Every house has its unique quirks, and those quirks love to present themselves at the worst time. If you run into unexpected structural scenarios, expect your installation timeline to stretch.
- Drywall-Only Anchoring: If you discover that there are no studs, you cannot just screw the track into drywall. A solid door can weigh up to 150 pounds and requires real framing support. You will need to cut open the drywall to add structural blocking, adding two hours of labor.
- Thick Door Trim and Baseboards: If your room features thick colonial trim, a standard track setup might cause rubbing. To fix this, you will need a thicker header board or extra spacers to extend the track out. Figuring out the exact geometry to clear the trim without creating a massive gap takes time.
- Uneven Floors: If your floor looks like a gentle rolling wave, a standard bottom guide will not function. You will spend extra time adjusting the height of the door to clear the high points. You must choose a specialized floor guide that keeps the door on track without scraping.
Architectural Flexibility and Style Options
One of the reasons these sliding systems are popular is that they are not one-trick ponies. They fit remarkably well into almost any design ethos you can imagine for your living space. If you want a modern look, you can opt for a pristine white door with hidden hardware.
If you prefer a rustic vibe, raw steel tracks paired with a timber slab create a focal point. Because they glide parallel to the wall, they unlock valuable square footage in tight spaces. This makes them a brilliant choice for cramped master bathrooms or small home offices.
Midway through your design journey, exploring options from artisans like Tennessee Barn Doors can elevate the project. Their custom finishes ensure that the tracking mechanism operates smoothly while matching your specific style.
Incorporating high-quality materials from the start reduces the likelihood of alignment issues during mounting. This attention to detail results in a door that feels substantial yet glides with a single finger. Ultimately, choosing the right source for your materials transforms a utility project into an architectural statement.
Preparing for More Complex Projects
While a standard interior setup is a quick affair, residential architecture often demands creative solutions. If you step outside the box of a single opening, your project timeline will naturally expand.
| Project Type | Average Professional Time | Average DIY Time | Key Challenges |
| Single Interior Door | 1.5 - 3 Hours | 3 - 5 Hours | Finding studs, leveling the track. |
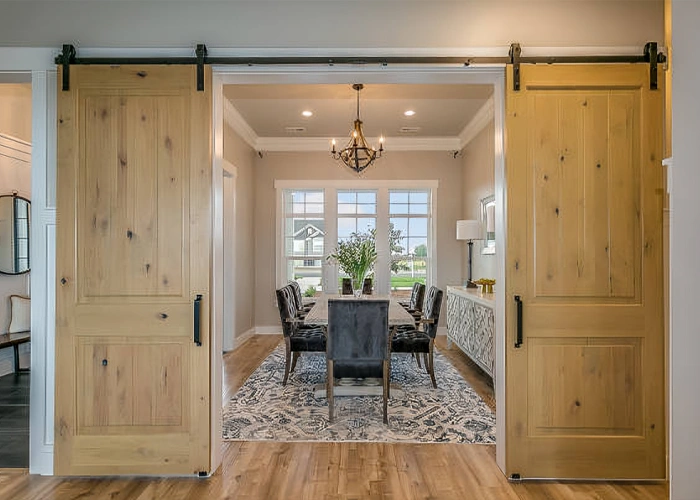
| Double / Bi-Parting Doors | 3 - 5 Hours | 5 - 8 Hours | Aligning two tracks perfectly so doors meet seamlessly. |
| Bypass System (Stacked) | 4 - 6 Hours | 6 - 9 Hours | Managing complex, multi-layered brackets. |
| Heavy Exterior Applications | 5 - 8 Hours | 8 - 12+ Hours | Weatherproofing, heavy-duty structural anchoring. |
If you decide to upgrade the entry points of your home, the dynamics change completely. Installing exterior sliding barn doors introduces structural challenges you do not face inside a hallway. You are no longer just trying to make the door look level for aesthetic purposes. You’re now actively fighting against changing weather conditions, wind, and rain.
The installation must be meticulously sealed against moisture and extreme temperature fluctuations. This requires specialized weatherstripping, heavy flashing, and rust-resistant tracks. Because the hardware must anchor deep into the exterior framing, these projects can easily take a full day.
Tips to Speed Up Your Installation Day
If you want to keep your timeline as tight as possible, preparation is essential. Do not wait until Saturday morning to figure out if you have all the necessary parts.
- Unbox and Inspect Early: The moment your hardware and door arrive, open the shipping boxes completely. Verify that every single screw, spacer, washer, and bracket listed in the manual is present. There is nothing worse than stopping halfway through because you are missing a critical lag bolt.
- Prep the Door Ahead of Time: If your door panel needs to be painted or stained, do it a few days in advance. Trying to rush a paint job so you can hang the door the same afternoon results in sticky smudges.
- Clear the Workspace: Move furniture, artwork, and rugs completely out of the zone where the door will operate. Give yourself plenty of physical space to lay out the track and lift the door safely.
Long-Term Maintenance: Keeping the Glide Smooth
Once your door is safely on the wall and sliding perfectly, the hard work is done. However, keeping it operating like a dream requires just a tiny bit of routine upkeep. Every six months, take a quick peek at the track to ensure dust or pet hair has not settled inside.
A simple wipe-down with a damp cloth keeps the rollers silent and efficient for years. Additionally, give the mounting bolts on the header board a quick check to ensure they remain tight. With minimal care, a well-installed sliding system will function flawlessly for decades in your home.
Choosing the Right Hardware and Craftsmanship
When you are ready to make this structural upgrade, component quality will directly impact your experience. Investing in premium, locally crafted options ensures that the pieces fit together without frustration.
By sourcing your project components from dedicated manufacturers like Tennessee Barn Doors, you secure the best results. Their precision-made kits eliminate the guesswork often found with cheap alternative hardware. Taking your time during the planning stages guarantees that your investment yields beautiful results.
Conclusion
Calculating a reliable barn door installation timeline depends heavily on proper prep work. While an interior door can be mounted over a quiet afternoon, exterior variations require a larger time investment. Whether you tackle the job yourself or hire a professional team, focusing on measurements will keep things moving. By avoiding rushed mistakes and utilizing high-quality local materials, you will successfully upgrade your home.
Frequently Asked Questions
Q. What is the average timeframe to complete a standard barn door installation in a modern house?
A standard barn door installation typically requires two to four hours to complete from start to finish. The experts at Tennessee Barn Doors note that this timeline depends heavily on structural wall preparation.
Q. Can a homeowner complete an interior barn door installation over the weekend without professional help?
Yes, a homeowner can successfully finish an interior barn door installation over a single weekend afternoon. The design team at Tennessee Barn Doors recommends mapping out your wall studs early to guarantee stability.
Q. How much extra time is required for an exterior sliding barn doors project compared to an interior setup?
An exterior sliding barn doors project generally requires a full day of labor due to weatherproofing demands. The production crew at Tennessee Barn Doors emphasizes that environmental sealing adds significant steps.
Q. What tools must you gather before starting the setup of exterior sliding barn doors on a patio?
Before mounting exterior sliding barn doors, you must gather a heavy drill, a long level, and fasteners. Tennessee Barn Doors advises that having these specialized weather-resistant tools ready will reduce time.
Q. Why does structural wall leveling take up the most time during a residential barn door installation?
Structural wall leveling takes the most time because older residential walls are rarely perfectly square. The technicians at Tennessee Barn Doors know that skipping this calibration stage will cause sliding issues.
Q. Should you hire a licensed contractor for an exterior sliding barn doors project to save personal time?
Hiring a certified professional for your exterior sliding barn doors project will save you hours of labor. The consultants at Tennessee Barn Doors state that professional execution guarantees proper wind resistance.
Q. How does choosing a premium hardware kit affect the overall barn door installation timeline?
The choice of a top-tier track system plays a central role in your project. Choosing a premium hardware kit minimizes installation time by eliminating mismatched components. Every kit provided by Tennessee Barn Doors features aligned mounting points, which streamlines assembly.